Step 1: Choose the Right Hosting Provider
Before installing WordPress, select a hosting provider that suits your needs.
✅ Best for Beginners: Bluehost, SiteGround
✅ Best for Speed: Kinsta, Cloudways
✅ Best for Budget: Hostinger, Namecheap
Step 2: Download WordPress
Visit WordPress.org and download the latest version.
Step 3: Upload WordPress to Your Server
- Use cPanel File Manager for quick uploads.
- Use FTP clients (FileZilla) if you're managing a remote server.
Step 4: Create a Database in phpMyAdmin
- Go to your hosting control panel.
- Open phpMyAdmin and create a new database.
- Assign a user with full privileges.
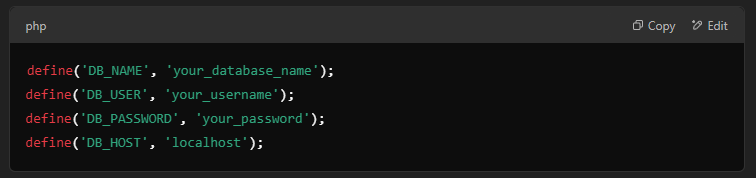
Step 5: Configure wp-config.php
Update the database details in the wp-config.php file before installation:
Step 6: Run the WordPress Installation Wizard
- Open your browser and go to yourdomain.com/wp-admin/install.php.
- Set up your site name, admin username, and password.
- Click Install WordPress and log in to the dashboard.
Post-Installation Checklist
✅ Install an SEO Plugin: RankMath or Yoast SEO for search optimization.
✅ Use a Caching Plugin: WP Rocket or W3 Total Cache for speed.
✅ Enhance Security: Install Wordfence or Sucuri for protection.
Pro Tips for WordPress Optimization
🚀 Use a LiteSpeed Cache plugin for better performance.
🚀 Enable lazy loading for images to improve page load times.
🚀 Keep plugins minimal to prevent bloated performance.